Awesome, Inexpensive, Machine Tool Light
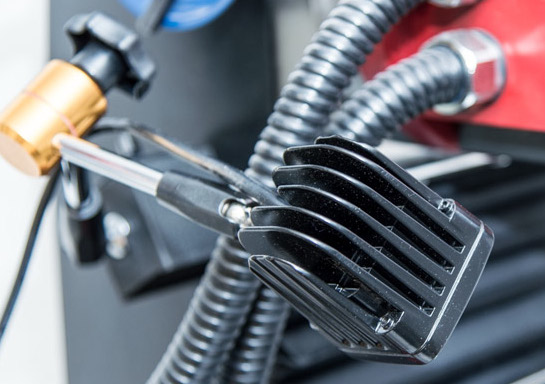
A high output, totally flexible, machine tool light, that costs only $50, and can be built and mounted in 15 minutes.
Seems too good to be true, but after I have been through a number of iterations on improving lighting on my mill, that is what I ended up with.

Background
When I got my Sieg SX3 I first mounted a small goose neck lamp with a 14W halogen reflector spot in an E14 mount. This worked fairly well, but didn't quite deliver enough illumination, and the emitted infrared heat from the lamp has annoying when working close to the lamp. Also, during extended periods, the lamp became fairly hot to the touch, so care had to be exerted not to touch the lamp. In short, a decent solution but with room for improvement.
Next up, was a small 3W LED lamp with a long goose neck. This lamp output less lumens than the first solution, but in a more tightly focused beam, and with the longer goose neck and smaller lamp head, it was easier to manoeuvre into place to provide the illumination where it was actually needed in relation to a specific cut, and avoid unwanted shadows. Given the low wattage emitted and built up heat was not an issue.
Both attempts were hastily put together to provide just some kind of illumination close to the spindle. I finally decided I needed to improve this, since I find proper illumination to make a huge difference in my work.
By chance I found some cool looking 10W and up LED lamps meant as work lights on tractors, trucks, ATVs, etc., and they seemed to be perfectly suited for this task:
- High lumens output
- Selection of flood or spot light
- Sealed to IP67 to provide good protection from "the elements". Here, that would be chips, coolant, etc.
- Efficiency comparable to compact fluorescent lamps, which watt-to-watt is a 2x improvement over halogen bulbs.
- It can be powered from any number of "wall warts" I already had lying around
Next up, I needed a flexible way of mounting the LED lamp on the mill (and other machine tools). The goose necks from my previous attempts were not going to carry the weight of the LED lamp head, so a different solution with the same manoeuvrability was needed.
I ended up with a universal magnetic stand for a dial indicator. The reach of the arm was somewhat less than I had hoped for, but other than that it seemed like the perfect solution:
- The magnetic base provided great freedom of placement on the mill (or any other machine tool), and plenty of holding force
- The single locking mechanism on the arm, made it a comfortable two-hand operation to position the lamp head and lock it into place. No wishing for a third hand.
- It was cheap
Built
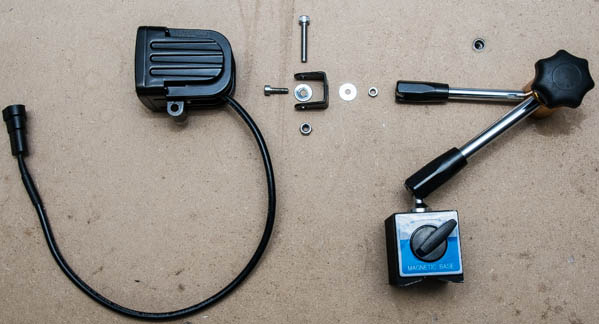
This is the BOM I ended up with:
- LED lamp ($20)
- An M4 stainless cap screw bolt
- Two M4 washers
- An M4 nut to go on the bolt
- Universal magnetic stand ($30)

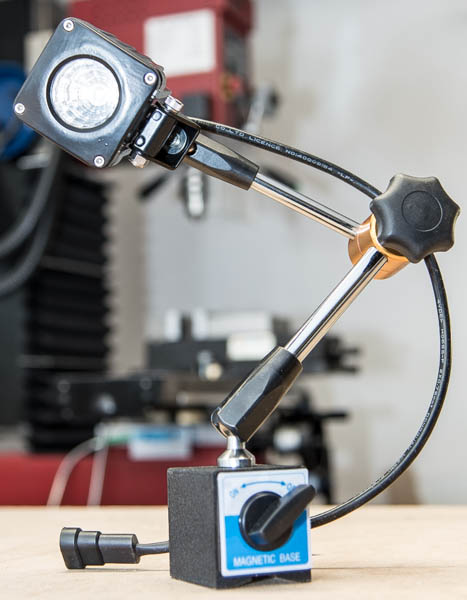
And this is what the kit looks like put together. I opted for a flood beam LED light, because I only have a small mill and the lamp head will be mounted in close proximity to the spindle. For larger machines or other situations where the lamp head is mounted further away from the action, I would recommend a spot beam shape.

I'm going to add a spot beam lamp to my setup, and move the flood lamp a little further away, to get good overall lighting of the work area, and concentrated illumination of the cutting action.
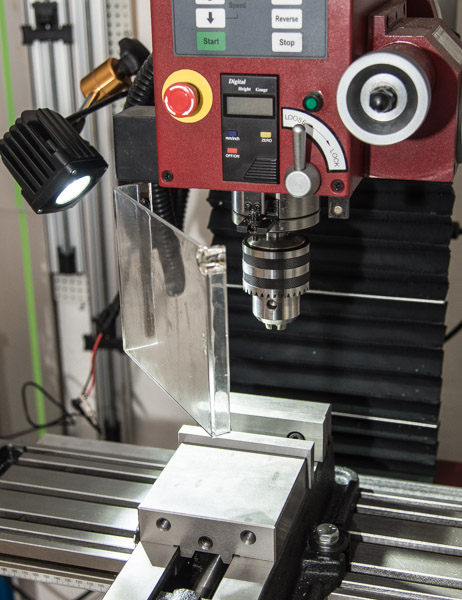
It is difficult to capture the level of light provided by the lamp. The dynamic range of this on-screen image is much less than what the human eye can discern, and is generally limited with the color depth of the display or print technology.

I do think this image captures the provided illumination fairly well, in relation to the overall lighting of the surroundings in my workshop, which is already very well illuminated with white walls and ceilings, and 200W of installed fluorescent overhead lighting in an area of just 12 m2.
blog comments powered by Disqus
Published
Tags
Related Posts
- Choosing A Mill
- DRO Mount (X-axis) on Sieg SX3
- DRO Mount (Y-axis) on Sieg SX3
- Simple Color Response Test (Method & Results)
- Z-axis Bellows Mount (Part 1): Introduction